Pages

Saturday, August 17, 2013

Great looking affordable and durable flooring!


Our first home is great, but carpet in the kitchen is a HUGE NO NO!

Blue carpet in the kitchen!  

Parkay Floors in the dinning room

My husband and I were looking for dark wood flooring that was affordable. Now let's face it, dark wood is never cheap. We are always on a tight budget so we looked into Lumber Liquidators.

The flooring we were looking for had to look good, be durable and be affordable. We looked at all the hardwood and it was too much, so we looked at the laminate... it was affordable but didn't look like it would last and I needed it to last with all the traffic that a kitchen has and spills. Laminate is not appropriate for spills!

I then saw a gorgeous wood color that caught my eye right away! It was love at first sight!  :) 

http://m.lumberliquidators.com/ll/c/Summer-Island-Teak-Click-Resilient-Vinyl-Tranquility-5ST/10024913

When I asked what it was they said it was a type of vinyl.... I thought "No way!" But once he told us about it, I knew it was the right choice.


When I think vinyl, I think plastic glued on to my floor coming off a few years later.
This floor is not glued it is installed just like laminate, it clicks together and best of all, it's WATERPROOF!! Perfect for a kitchen!

We bought it and my husband installed it himself with the help of a friend in about 4 hours!! 
My husband taking off the parkway flooring from the dinning room


The floor is scratch resistant, waterproof and it comes with a 50 yr. Warranty. We have had it for about a month and its holding up great, its easy to clean and so pretty!


We spend a total of about $800 for 15 boxes of flooring and 2 rolls of the padding! Great Deal!

  Here are a few pictures.
No more ugly blue carpet!  :)

Nice even look for both rooms

New kitchen floor
Doesn't it look so much better?

DIY Kitchen Cabinet Refinish!

So we bought our first home a little over a month ago and we are already doing so many changes. It was a nice house to begin with but let's just say it needs a lot of updating. Here is how we made our cabinets go from this...
to this...
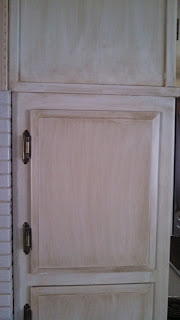
doesn't the kitchen look so much more roomy and the color just brightens up the whole room!  Now we are not experts and we had our doubts along the way but I really like the way it turned out. So let me start from the beginning.

My sister knew we wanted to do the project so she was kind enough to take me to Home Depot and pick up the Rustoleum Cabinet Transformation Kit.
    
http://cabinets.rustoleumtransformations.com

You can get an idea of it on their website. They come in many colors but I wanted a bright color so I went with the Ultra White.

The Kit comes with a DVD to explain all the steps and its pretty simple.

We started off by taking off all the doors and numbering them to keep track of where they went.

We then deglossed all the doors and the cabinets... this was the most time consuming,but at last we moved on.
We had to wait for it to dry completely and then we began to paint. It took 3 coats for mine to look decent. We waited about 3-4 hours in between each coat.

Once the last coat was dry we added the glaze. This is an optional step but in my opinion it was what gave the cabinets some character. Be careful and be consistent in the finish you want. To move faster, my husband would spread the glaze and my sister and I would wipe. Make sure you are always checking to make sure you have an even finish with all the parts. For example that some parts aren't darker than others.
Wait a few more hours for the glaze to dry and add the last few coats of clear gloss. 

The DVD has additional information on different techniques or what to do if you are changing hardware, but we liked our vintage hardware so we just cleaned them and used those.

The whole process took about 2-3 days but it saved us a ton and it was well worth it! I love showing off our 'new' cabinets and people love that day look vintage...just what we were going for.  I'm sure they can look modern too once you change the hardware and decor. But I love the look that it has now.  

In total my sister spend about $110 including the Rustoleum Cabinet transformation kit, a roll of plastic tarp, a roll of painter's tape and 4 paint brushes!

Now that's a deal!!

Try it out, I would love to see your pics!  

Here are a few more pictures! Enjoy!

Here you can see the pretty vintage hardware that we decided to keep.

Here you can see the wood grain coming through the bottom

This is the little corner nook that took me forever to degloss  :)

I loved these and decided to keep them for the same reason that I wanted the vintage look


Cute right?